

How to change your heel tips: Step by step
- Posted on
- By Pieter
- Posted in How to
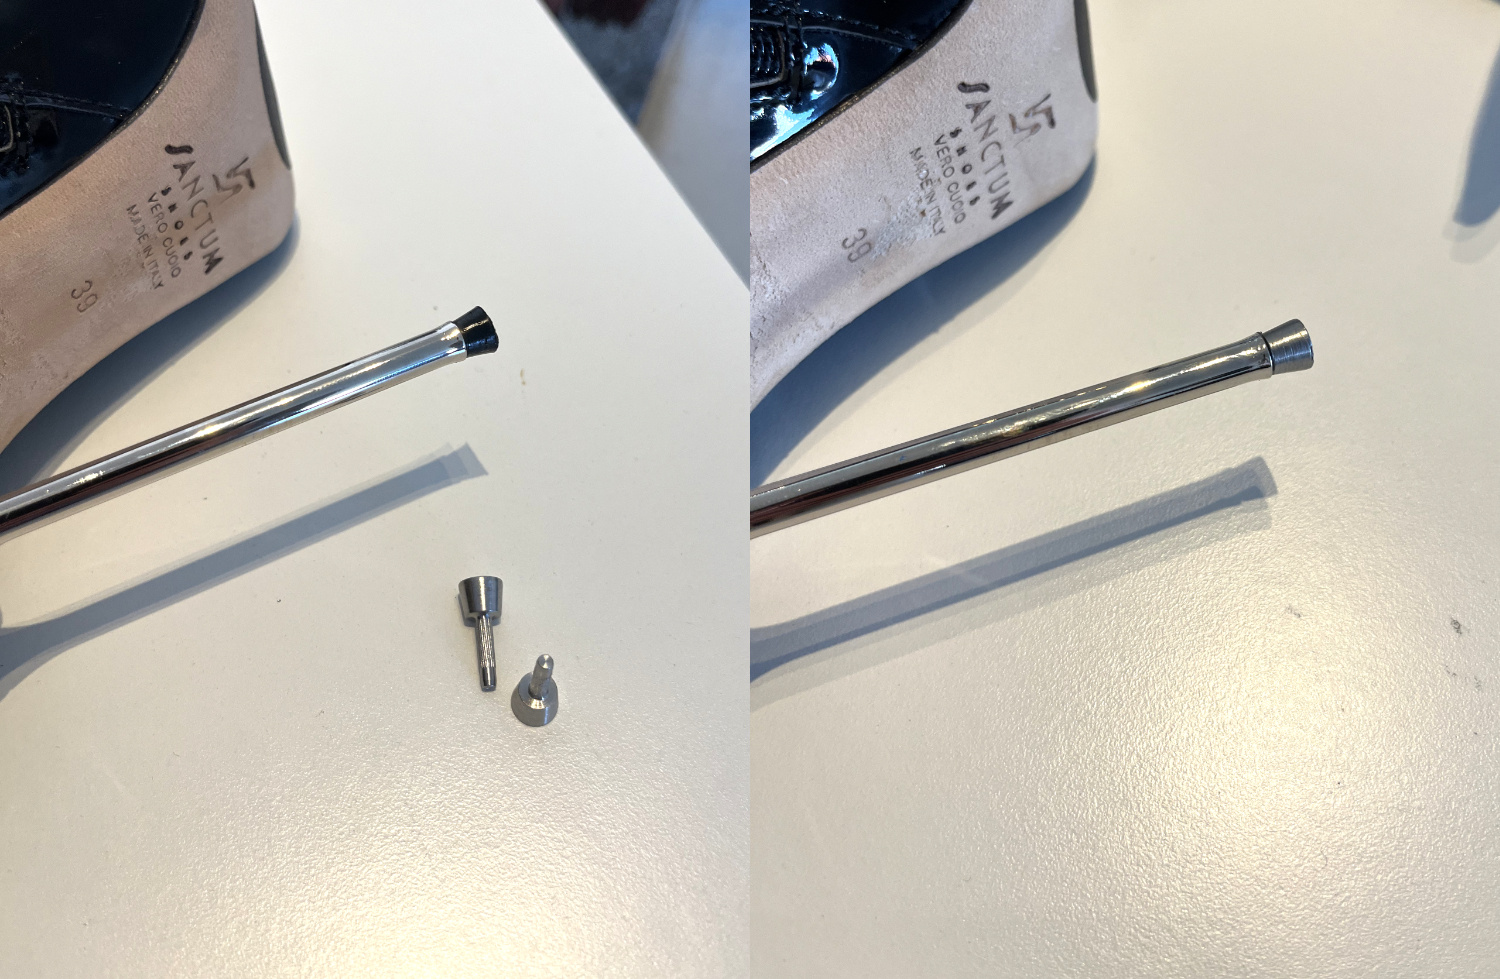
Replacing heel tips is a simple and effective way to extend the life of your shoes. Whether you're looking for that satisfying click with our metal heel tips (available in our store), or simply replacing worn-out or damaged tips, this guide will walk you through the process. With just a few tools, you can restore your shoes and enjoy a fresh new sound or functionality!
Replacing your heel tips is something that you are going to have to do someday, so here is a quick guide on how you can do that. On extreme heels, especially anything above 10cm, a worn-down tip changes how the heel makes contact with the ground and can affect your balance and grip. Replacing them yourself is a quick fix that takes minutes once you have the right tools, and it means you don't have to wait for a cobbler appointment to keep wearing your favourite pair. Replacing your old plastic heel tips with metal ones means that you will likely never have to replace them again, unless you are really using your heels!
What you'll need:
- Replacement heel tips
- Pliers
- A small hammer (or something that you can use as a hammer)
- Glue/superglue (recommended)
A quick tip before you start replacing your heel tips: make sure you have walked on your old heel tips, and these are semi-worn or completely worn out. This makes it so the shaft where the heel-tip-pin is in, is a tiny bit wider, which makes it a lot easier to replace your heel tips. Otherwise, you may experience a shaft that is too narrow and will make it very hard to put in the new metal heel tips.
Step 1: Remove the old heel tips
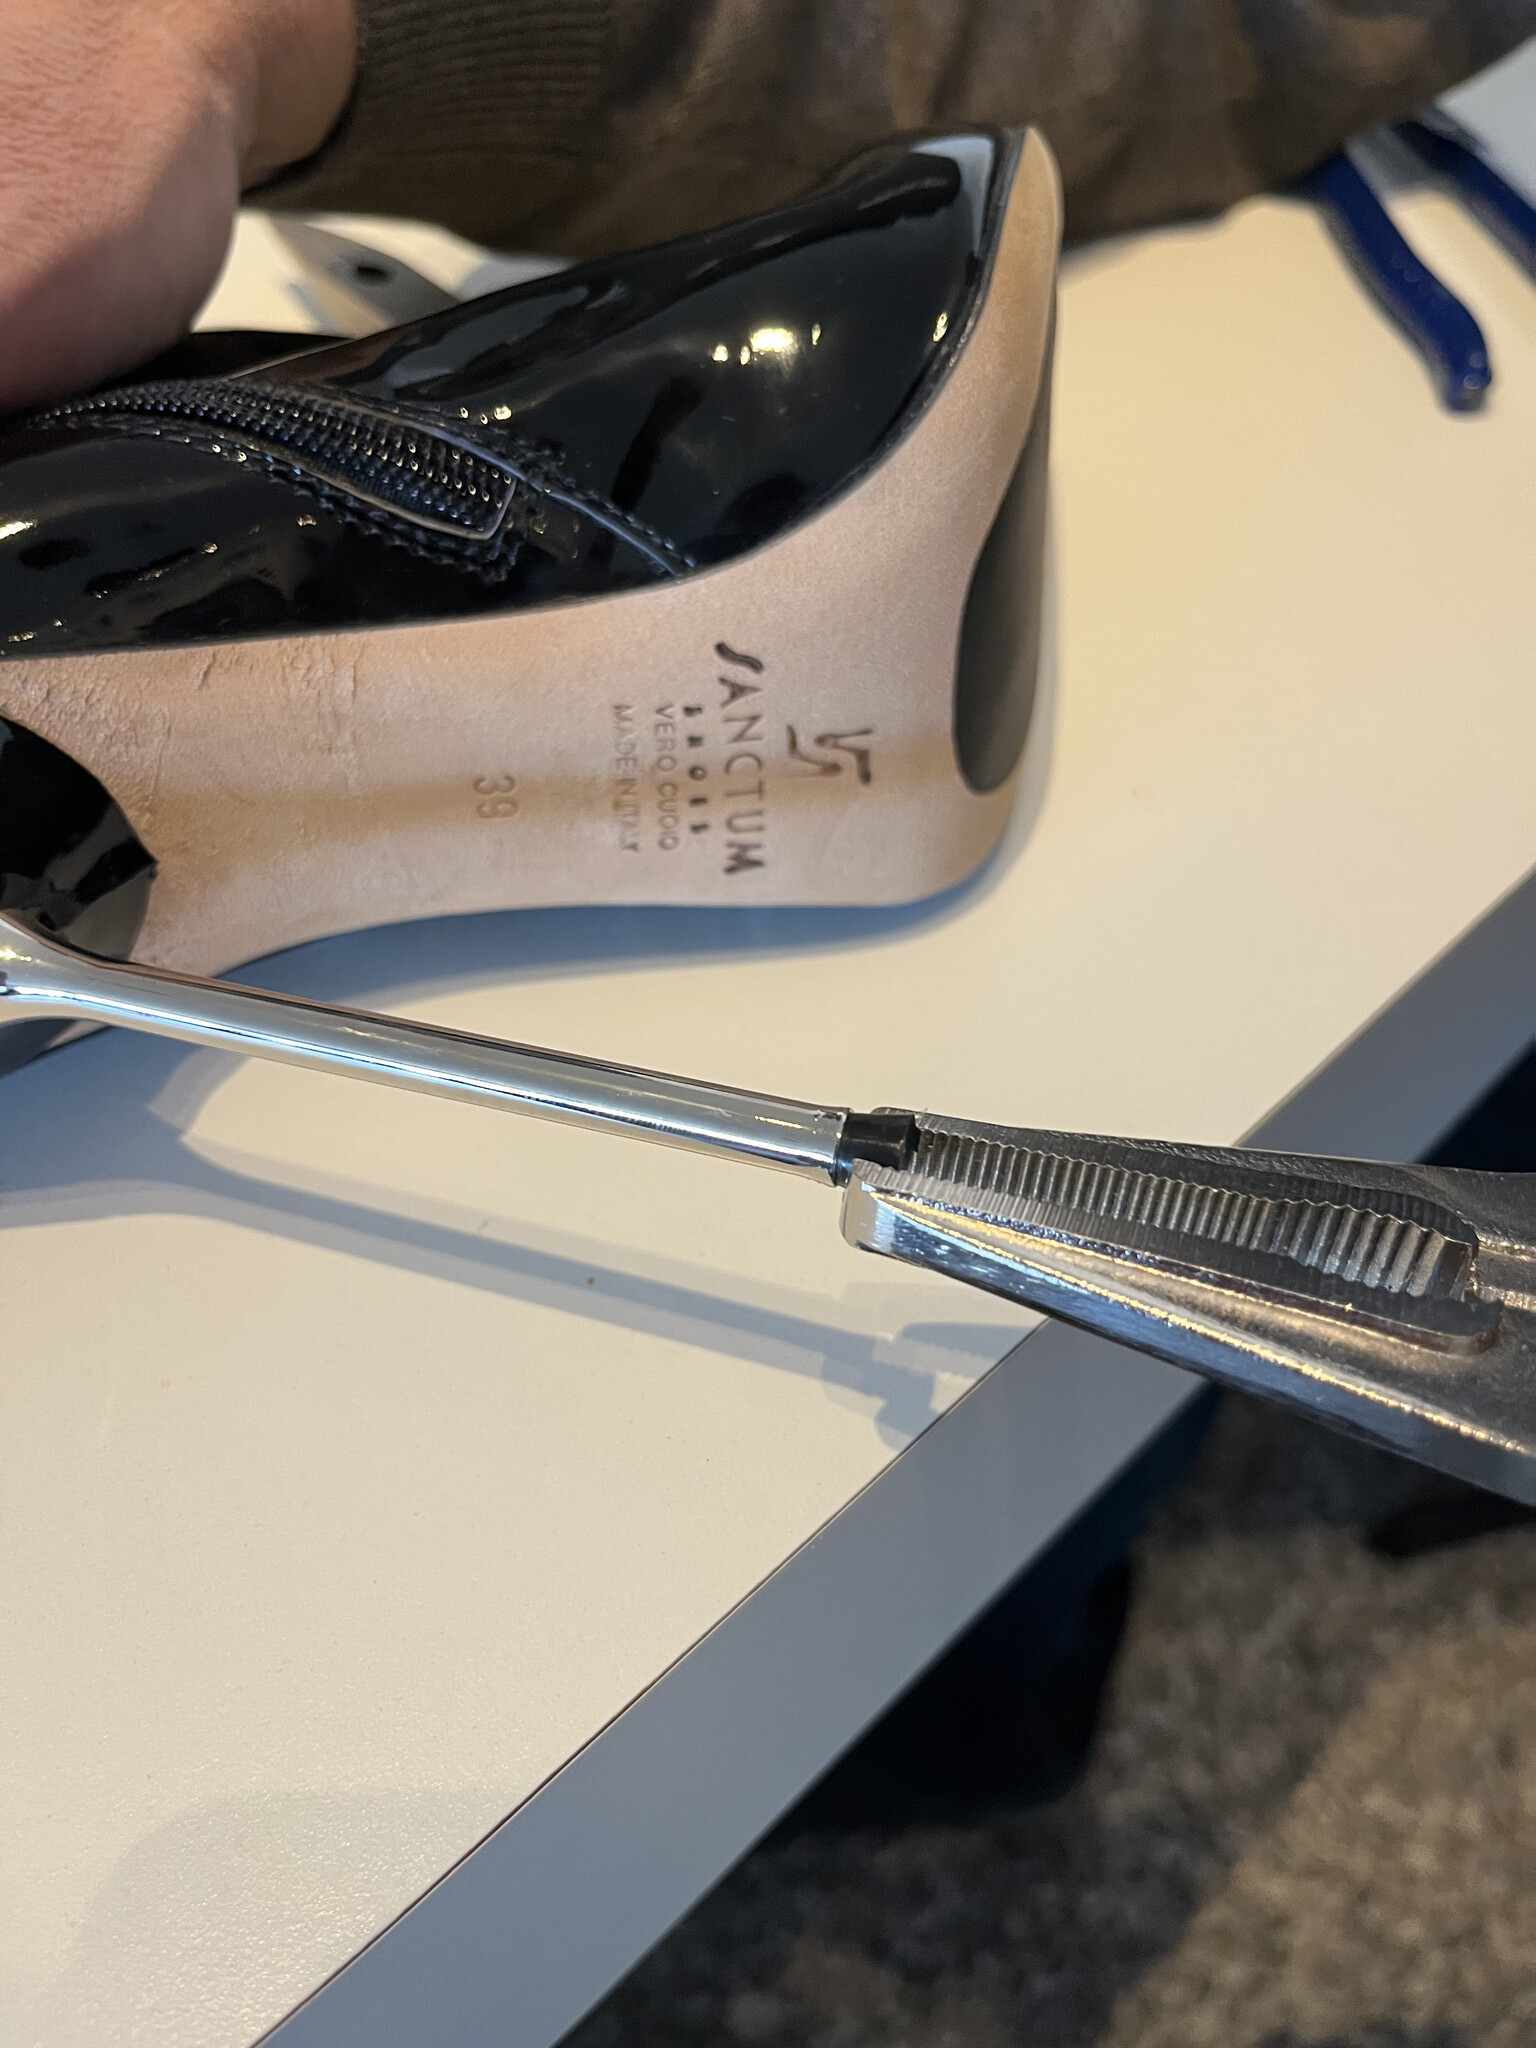
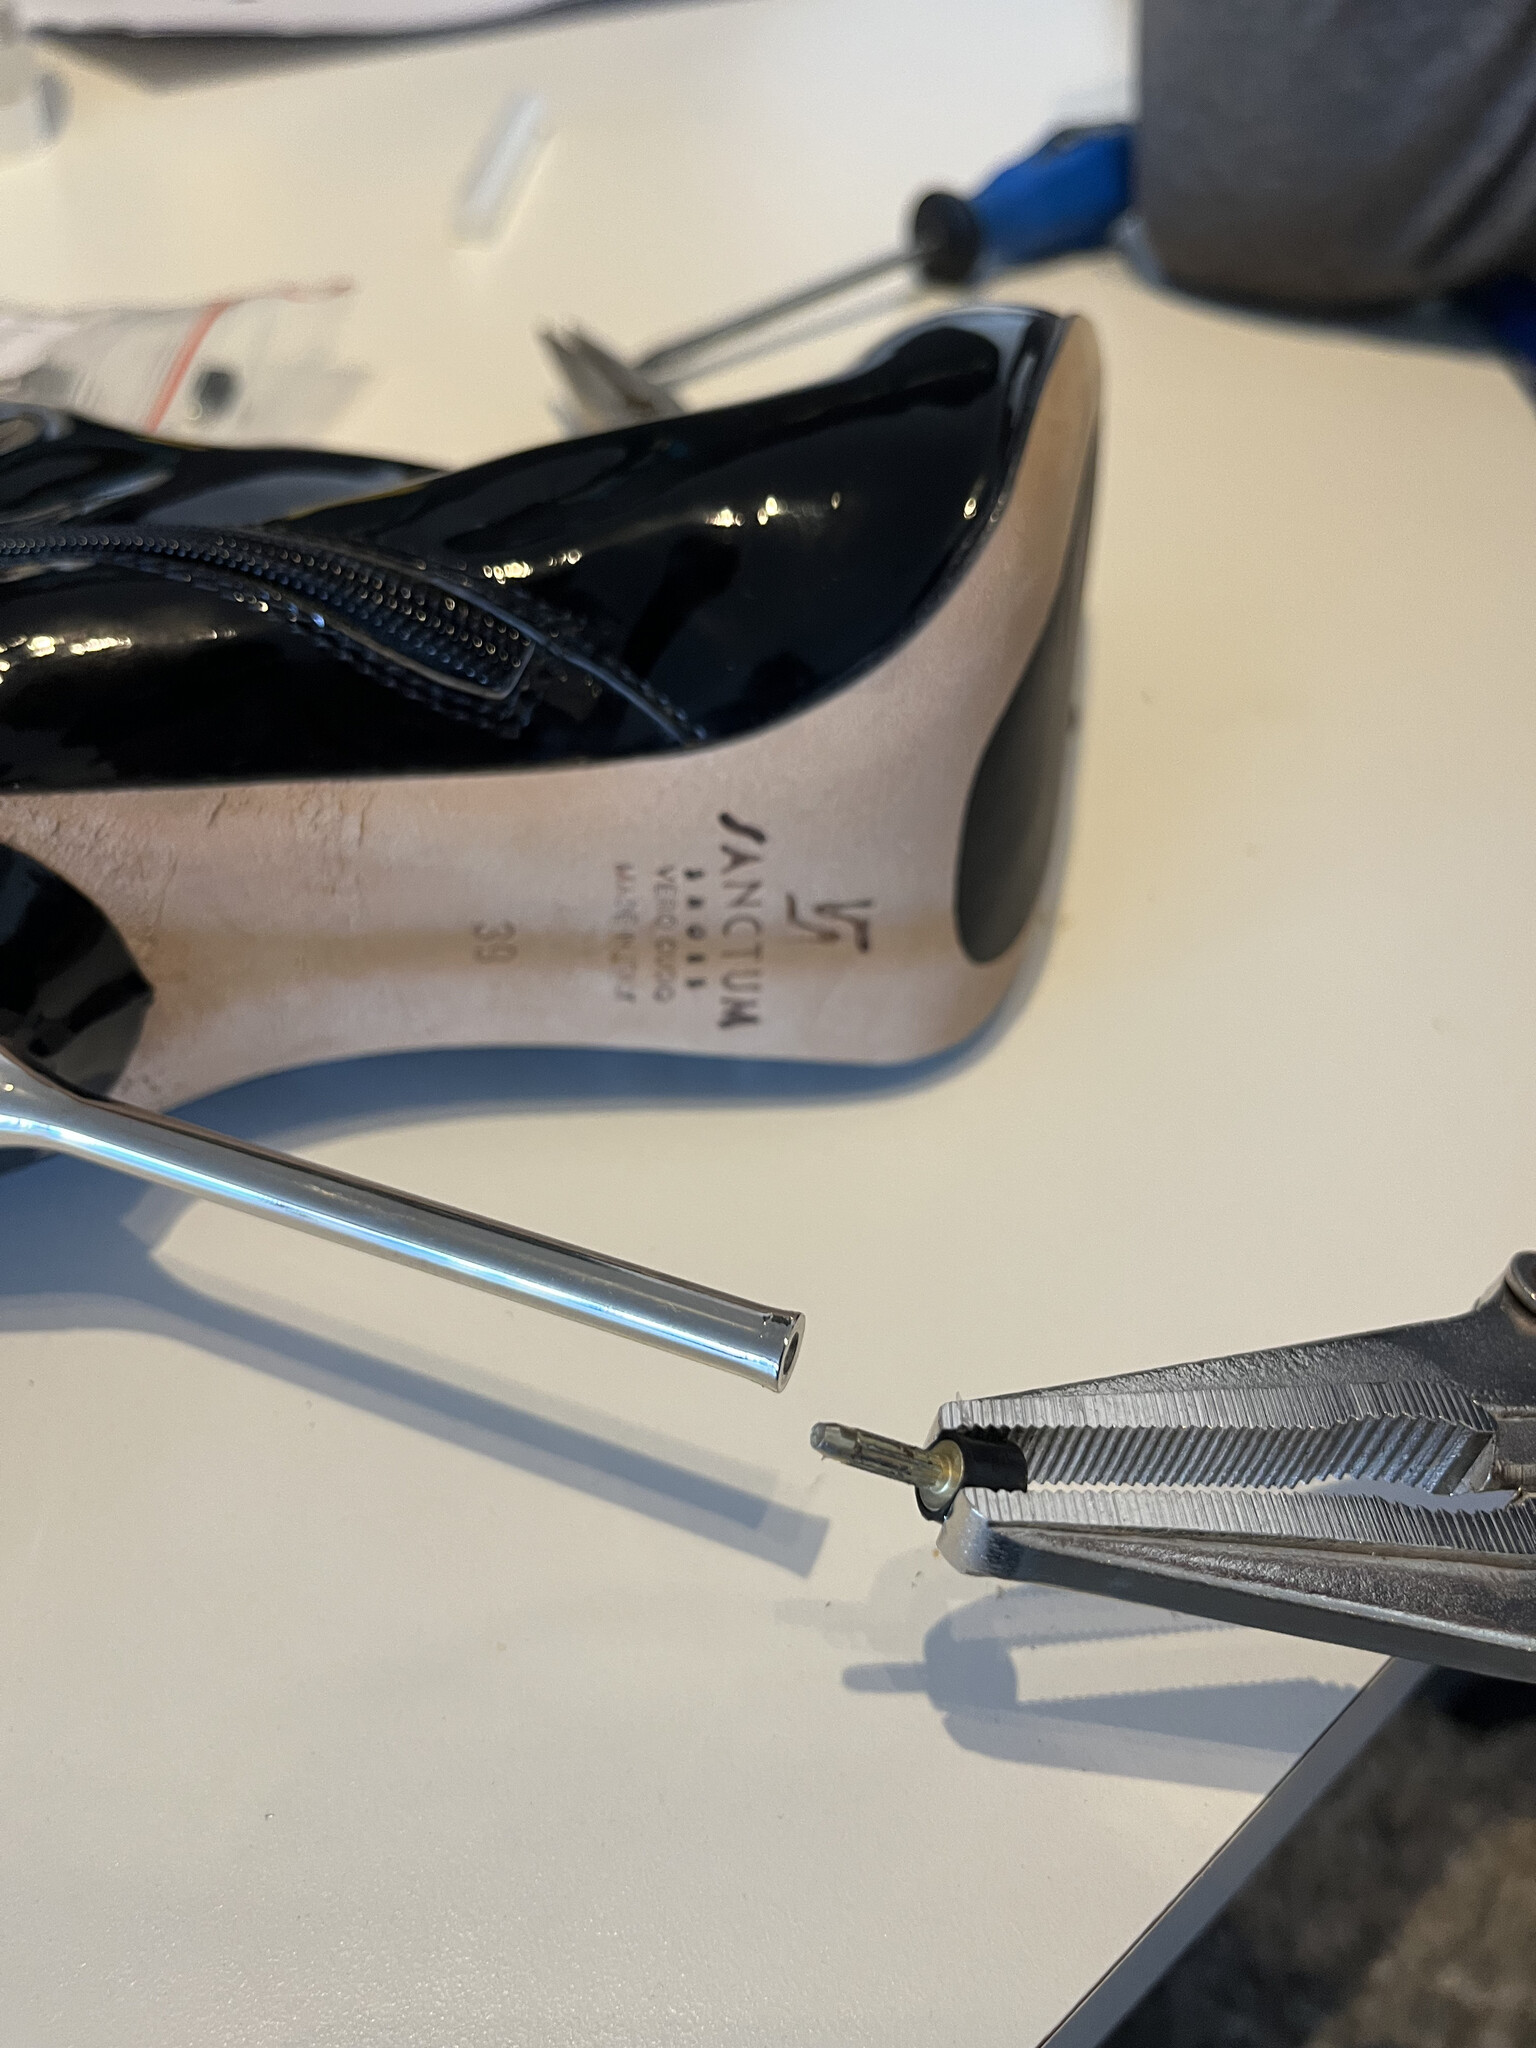
Use pliers to grip the old heel tip firmly, close to the base rather than the tip itself, since gripping too close to the top gives you less control and more chance of the pliers slipping. Apply gentle but firm pressure, you don't want to scratch or damage the heel as this can leave permanent marks. Twist the tip slightly while pulling straight down, rather than pulling at an angle, to loosen it evenly around the pin instead of bending the pin inside the post. If the tip doesn't budge, a few seconds of warmth from a hairdryer on the base can soften old glue residue and make it come loose more easily.
Step 2: Align the new heel tip
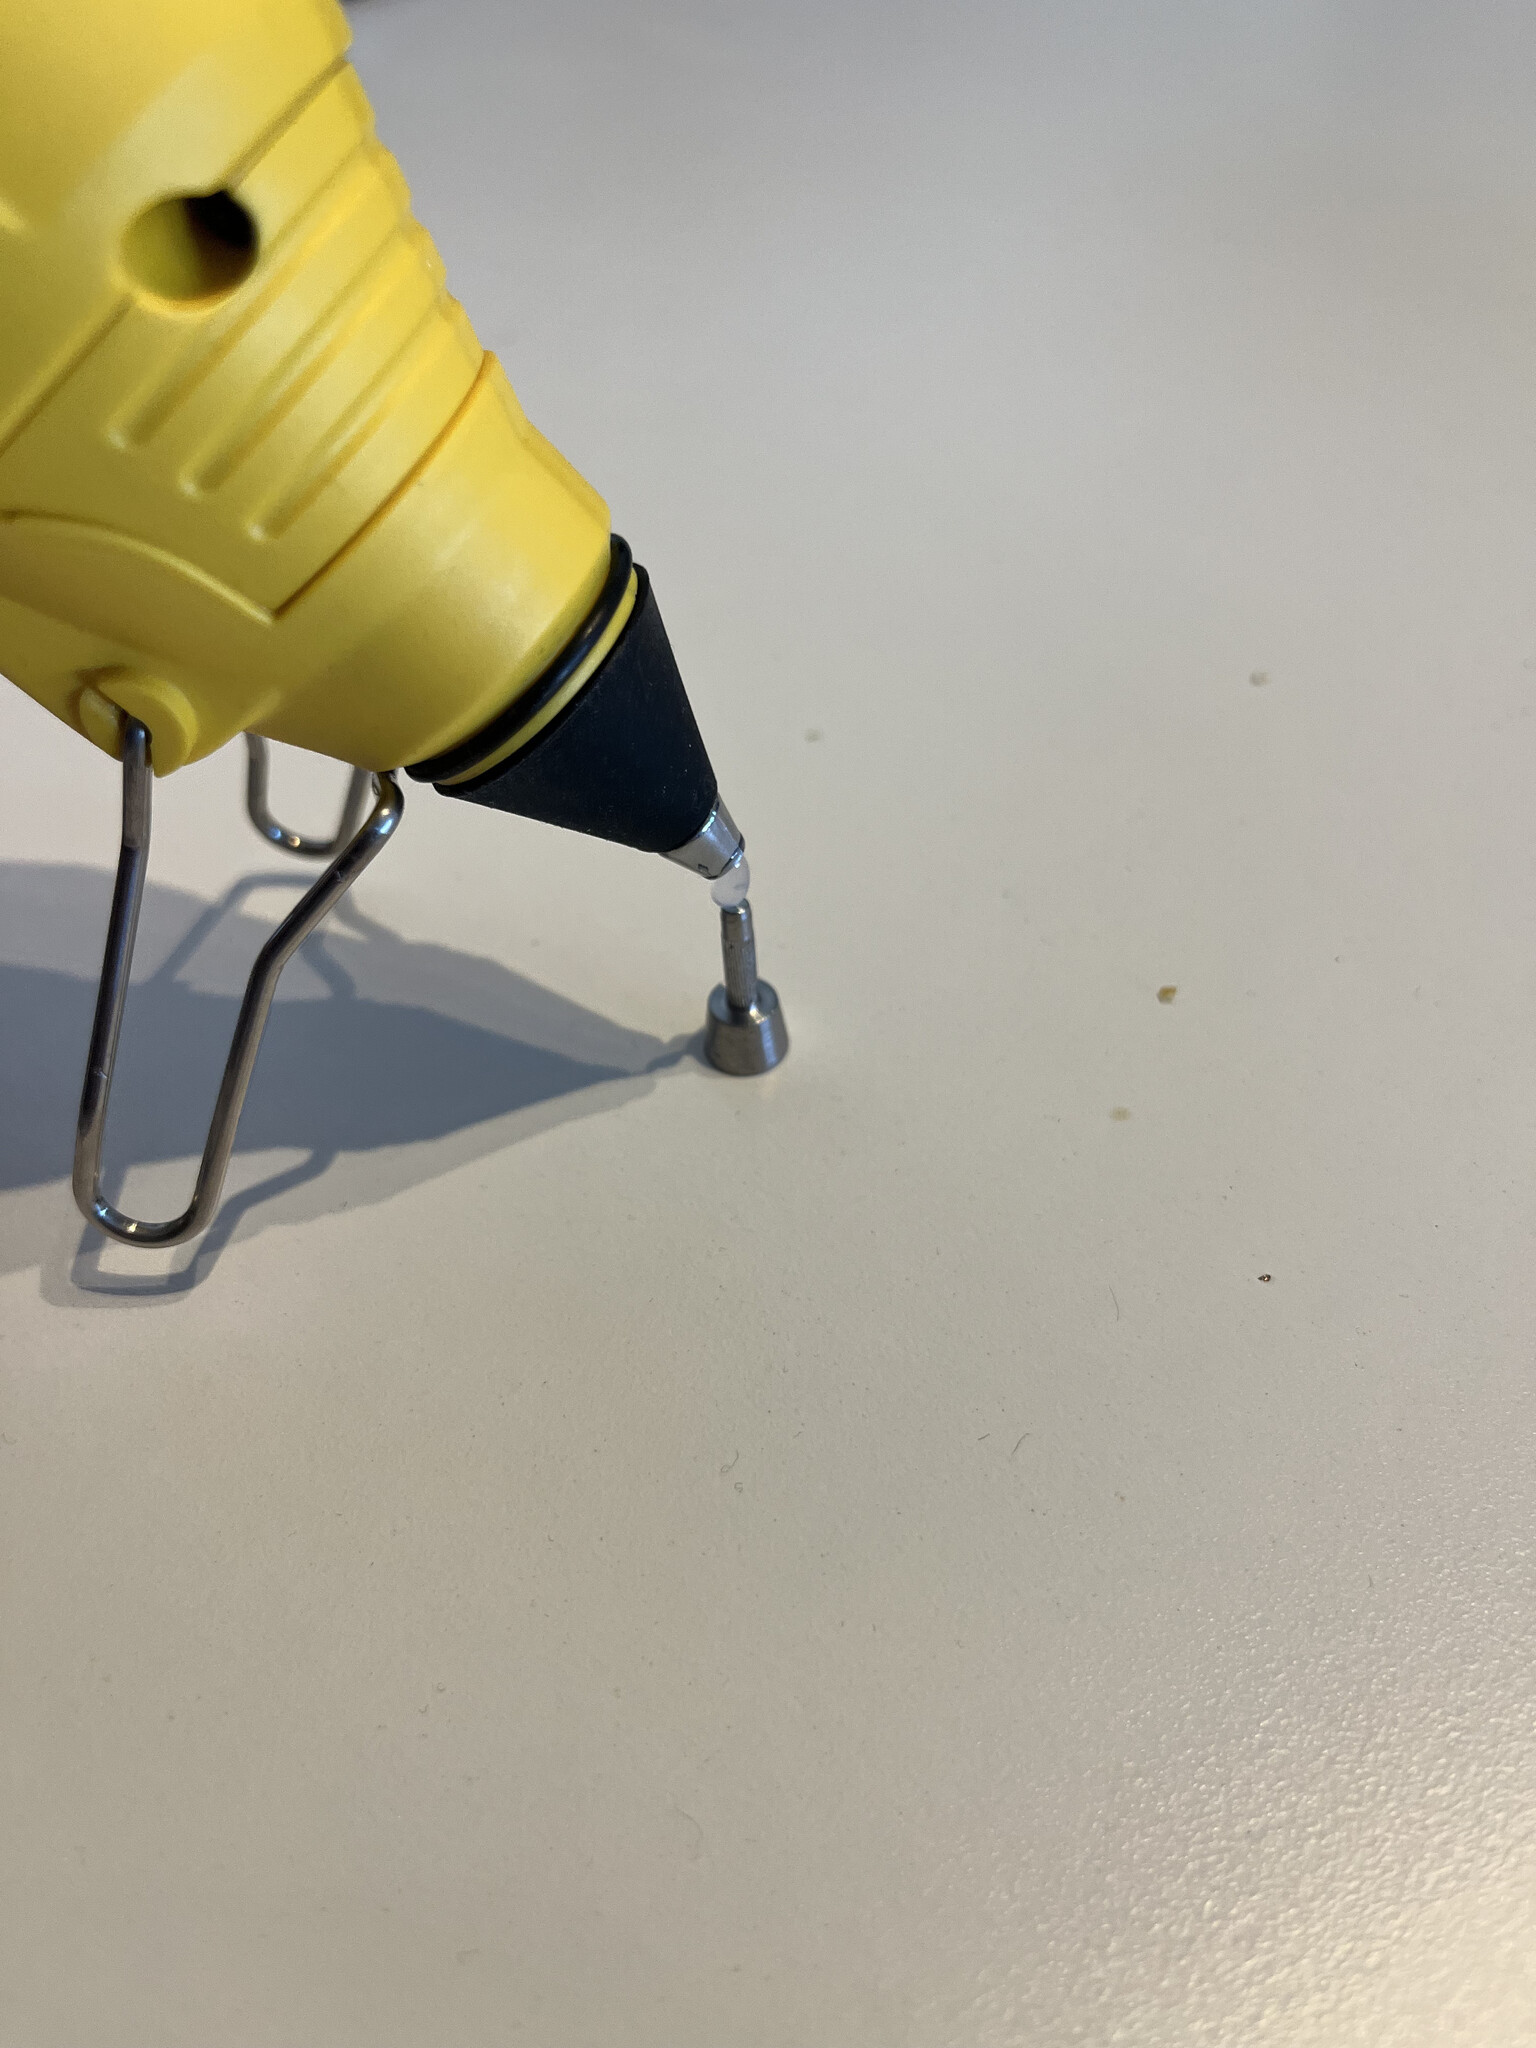
Grab your replacement metal heel tips and apply a small amount of glue (optional but recommended). Make sure you have checked that the replacement heel tips you have bought are the same size as the ones that were previously used. The most important thing is that the pin lengths and thicknesses of the heel tips are the same. This information is on the product page of our replacement heel tips. If a new pair of heel tips is too big, it won't fit and can get very hard to remove once u have used force to push it in.
Once you have the right size, apply a small amount of glue at the top of the pin, not the base plate. Push the new heel tip firmly and evenly into the post immediately after applying the glue. Use a hammer if necessary to push the heel tip all the way in; this is not needed, and you can also just push it in if that works as well.
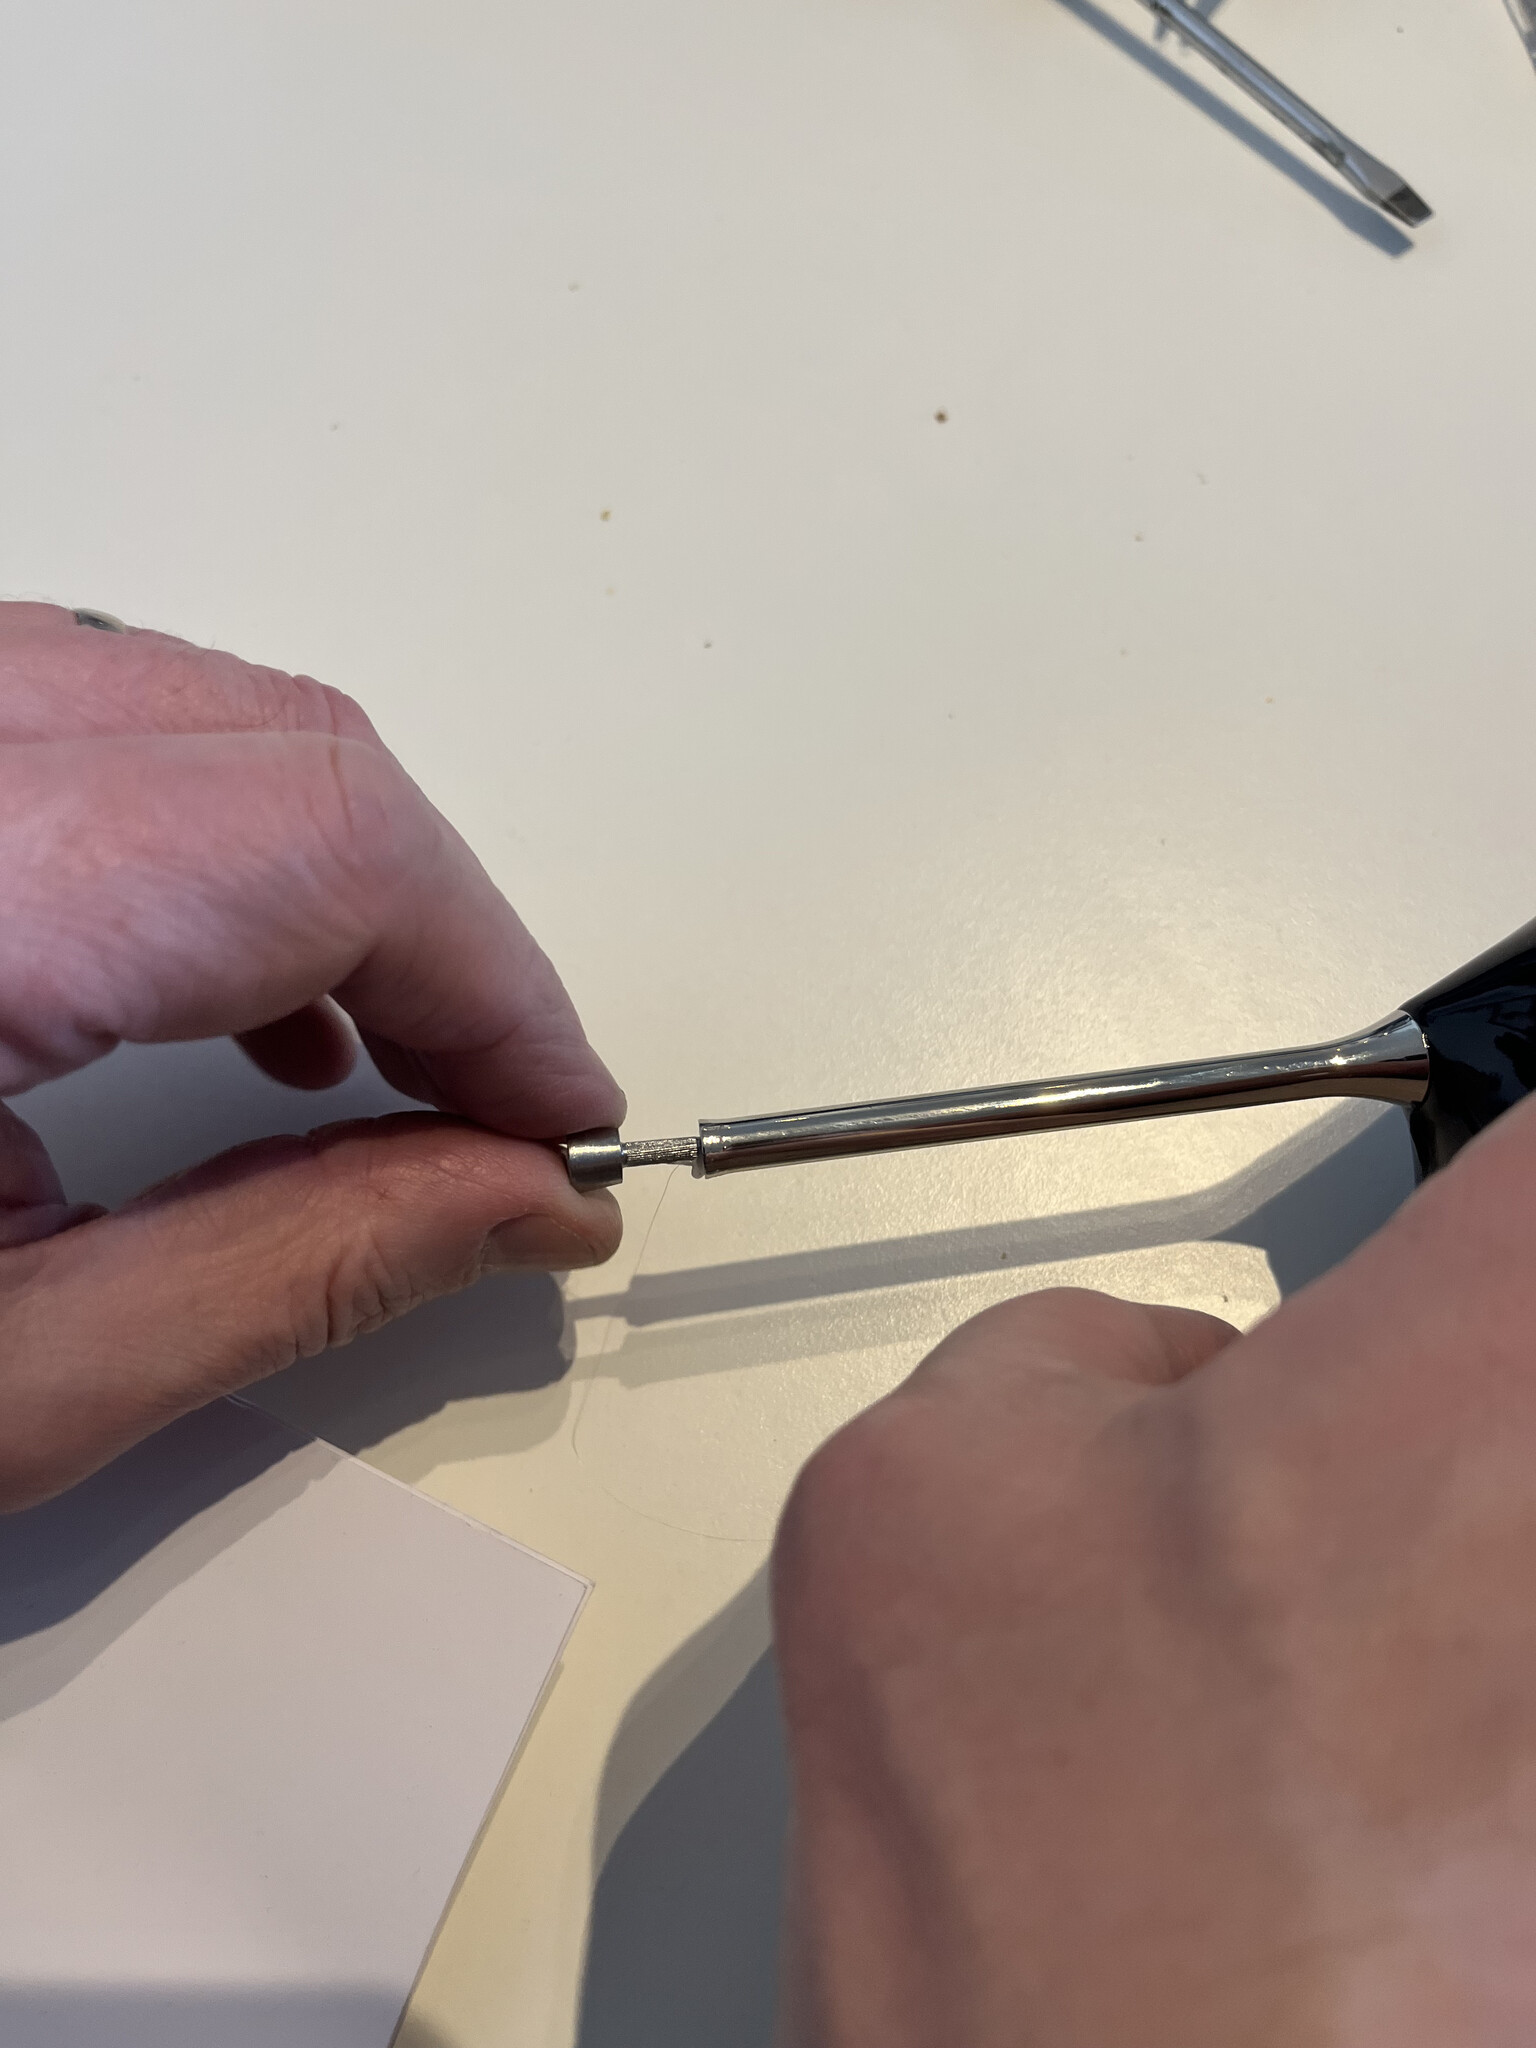
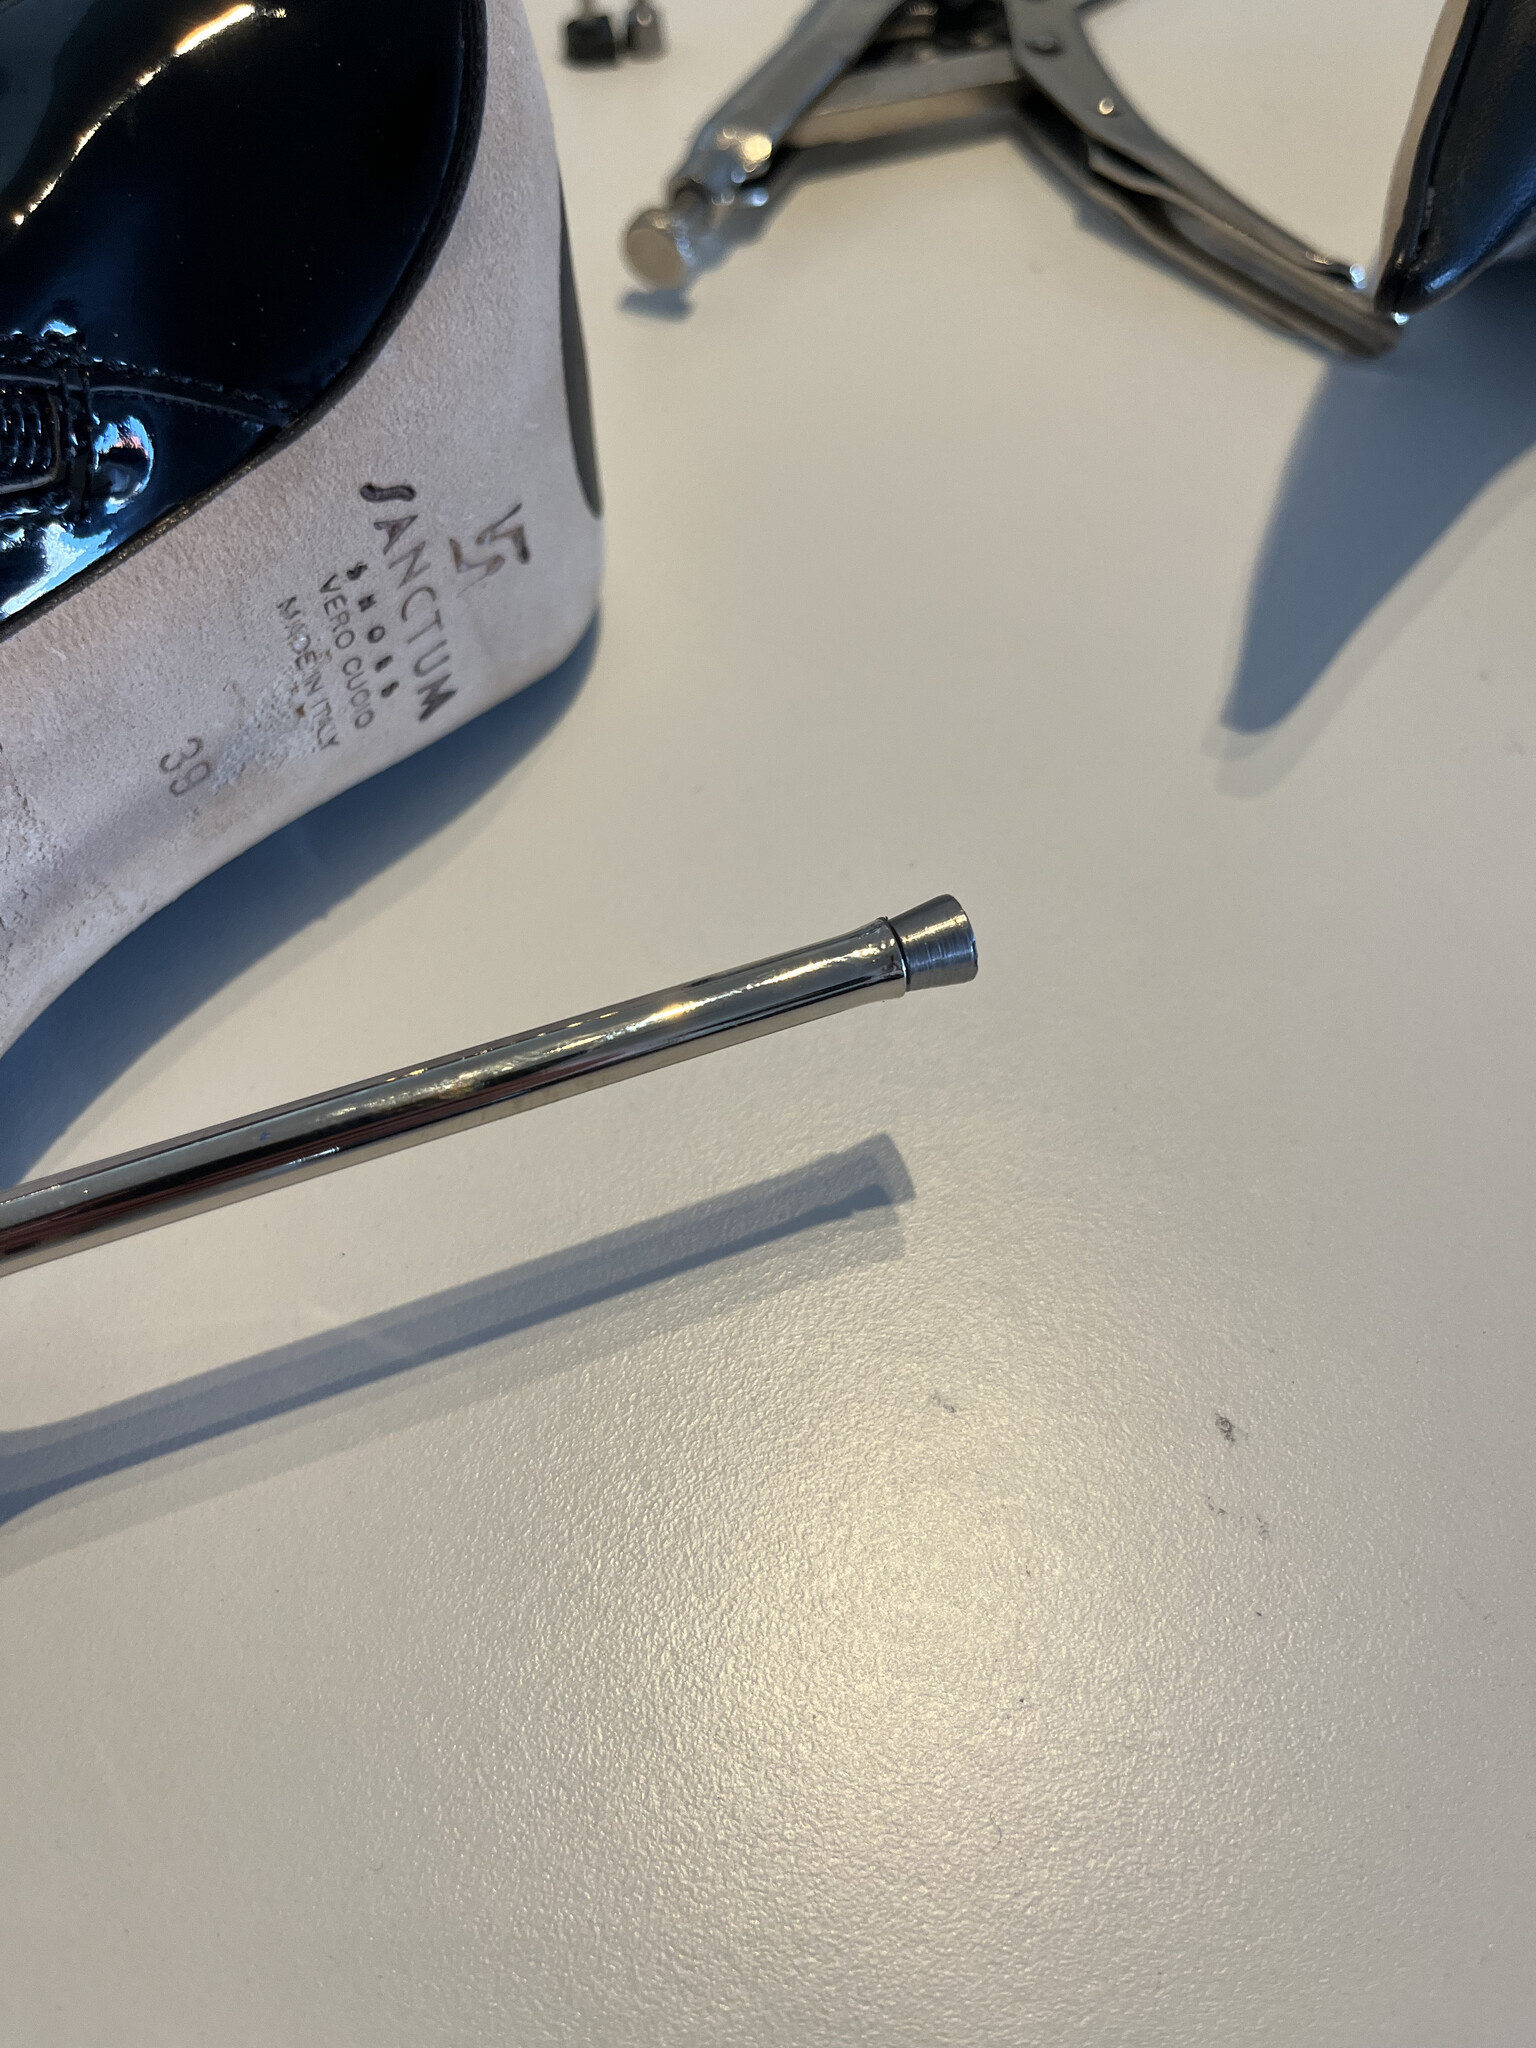
Step 3: Test and enjoy!
Let the glue cure fully before wearing the heels. Most glue reaches a solid bond within a few minutes, but full strength can take longer, so give it at least an hour if you can. Once dry, check that the tip sits flush against the post with no visible gap, and press down firmly to confirm nothing shifts.
Not confident in changing your heel tips? Make sure you don't change them if u are not confident enough to do it yourself. Contact your local professional cobbler. They have the right equipment and expertise to replace your heel tips safely and ensure your shoes stay in top condition!
When to call a cobbler instead
If the heel post itself is damaged, cracked, or the metal pin inside has bent, replacing the tip yourself won't fix the underlying issue. A local cobbler has the tools to replace the post itself if needed, and it's worth the visit rather than risking a heel failing while you're wearing it.
Need new heel tips? Check out our high-quality heel tips designed for durability and comfort!
FAQ
How do I know if my heel tips need replacing?
A clicking sound with every step is the clearest sign that's usually the metal pin inside is starting to show through the worn tip. Visually, look for an angled or uneven edge instead of a flat one.
Can I replace heel tips myself, or do I need a cobbler?
You can replace them yourself with pliers, glue, and a small hammer, and it takes only a few minutes. If the heel post itself is damaged, cracked, or the pin inside is bent, that's a job for a cobbler rather than a DIY fix.
Do I need glue to replace heel tips?
Glue isn't strictly required, but it's recommended. It secures the tip in place and adds extra stability, especially on heels above 10cm where more pressure goes through the tip.
How do I know which replacement heel tip size to buy?
Check the pin length and thickness against your old heel tip. This information is on the product page for our replacement heel tips. A tip that's too big won't fit properly and can be very difficult to remove once forced in.
Are metal heel tips better than plastic ones?
Metal heel tips generally outlast plastic ones by a wide margin. Once replaced with metal, you'll likely never need to replace them again unless you wear your heels very frequently. The trade-off is cushioning: metal doesn't flex or compress on impact the way plastic does, so each step transfers more directly through the heel. Plastic tips absorb a small amount of that shock before it reaches your foot; metal doesn't, so walking can feel slightly harder underfoot.
- Shop the Giaro High Heels Sale now!
- Sizing, Fit and Walking, Explained by Hannah On Heels
- High Heel Toe Shapes Explained
- The Taya Restock is here!
- How to care for your smooth nappa leather boots: Step by step
- How to change your heel tips: Step by step
- Italian Block Heels have arrived!
- New Italian High Heels
- Shop is open during warehouse move
- Compare Giaro High Heel models